To attach a heat shield, first, ensure the surface is clean and free of debris. Then, use high-temperature adhesive to securely attach the shield to the desired area.
Heat shields are an important component in various industries, protecting equipment and personnel from extreme temperatures. Whether you are working on a vehicle, machinery, or other equipment, knowing how to properly attach a heat shield is crucial for ensuring safety and optimal performance.
In this guide, we will provide step-by-step instructions on how to attach a heat shield with ease. By following these simple instructions, you can effectively protect against heat-related damage and enhance the efficiency of your equipment. So, let’s get started and learn how to attach a heat shield like a pro.
Contents
- Understanding The Purpose And Benefits Of A Heat Shield
- Equipment And Materials Needed
- Identifying The Proper Location For The Heat Shield
- Cleaning And Prepping The Installation Area
- Mounting Techniques
- Step-By-Step Installation Process
- Checking For Secure Mounting
- Conducting Temperature Checks
- Regular Maintenance And Inspection
- Seeking Professional Assistance
- Enjoying The Benefits Of A Properly Attached Heat Shield
- Frequently Asked Questions For How To Attach A Heat Shield
- Conclusion
Understanding The Purpose And Benefits Of A Heat Shield
A heat shield serves a crucial role in protecting sensitive components from heat damage. It acts as a barrier, preventing excessive heat from reaching these vital parts. By doing so, it helps enhance overall safety and performance. Heat shields are commonly used in various industries, including automotive, aerospace, and electronics.
Their purpose is to minimize the risk of component failure due to overheating, which can lead to costly repairs or even accidents. Additionally, heat shields help maintain optimal operating temperatures, ensuring that machinery and equipment function efficiently. They are designed to withstand high temperatures and provide insulation, shielding delicate parts from the damaging effects of heat.
Overall, attaching a heat shield is a simple yet effective way to safeguard crucial components and improve the longevity and performance of various systems.
Equipment And Materials Needed
To attach a heat shield, you will need the appropriate shield for your specific application, along with mounting brackets or clamps. Additionally, gather basic hand tools such as a screwdriver and wrench. Before starting the installation process, make sure you have all the necessary equipment and materials.
Begin by selecting the right heat shield for the job, considering factors such as size, shape, and material. Once you have the shield, attach it securely using mounting brackets or clamps. Use the provided instructions or consult online resources for guidance on the proper installation technique.
Take your time to ensure the shield is securely fastened, as it plays a crucial role in protecting surrounding components from excessive heat. With the right tools and careful attention to detail, you can successfully attach a heat shield to your desired application.
Identifying The Proper Location For The Heat Shield
When attaching a heat shield, it is crucial to identify the proper location. Begin by assessing the heat source and vulnerable components to determine the areas that require protection. Additionally, ensure that there is sufficient space for installation. Measure the available room and compare it to the size of the heat shield.
It is important to avoid overcrowding or blocking other components. By carefully selecting the appropriate position, you can effectively safeguard surrounding parts from excessive heat. Proper placement plays a vital role in maximizing the heat shield’s effectiveness and preventing any potential damage.
With these guidelines in mind, attaching a heat shield becomes a straightforward process that helps maintain optimal performance and longevity of the protected components.
Cleaning And Prepping The Installation Area
Cleaning and prepping the installation area is crucial when attaching a heat shield. Removing any debris or oil ensures a clean and flat surface for attachment. The presence of debris or oil can hinder the shield’s adhesion and compromise its effectiveness.
By thoroughly cleaning the area, you create a suitable foundation for the heat shield to stick properly. Make sure to remove any loose dirt, grime, or oil residue using a mild detergent or a suitable cleaning solution. Once the area is clean, dry it thoroughly to eliminate any moisture.
This step is essential as moisture can also affect the bond between the heat shield and the surface. Taking the time to clean and prep the installation area will help ensure a secure and long-lasting attachment of the heat shield.
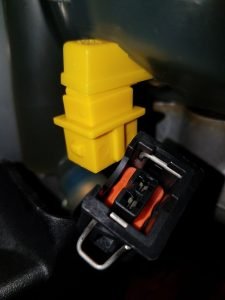
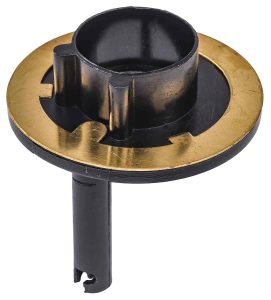
Mounting Techniques
When attaching a heat shield, there are various mounting techniques that can be employed. One commonly used method is the clamp-on technique. This involves using clamps to secure the heat shield in place. Another option is the bolt-on method, which requires using bolts to attach the heat shield to the desired area.
Finally, the weld-on method involves welding the heat shield directly onto the surface. Each of these techniques has its own advantages and considerations, depending on the specific application and requirements. It’s important to carefully assess the situation and choose the most appropriate method for attaching the heat shield to ensure optimal performance and safety.

Credit: m.youtube.com
Step-By-Step Installation Process
When attaching a heat shield, the first step is to mark the mounting points on both the heat shield and the surface you are attaching it to. This will ensure proper alignment and positioning. Once the marks are made, align the heat shield with the surface, making sure it fits properly.
Double-check the positioning before proceeding. Next, secure the heat shield in place using the method of your choice. This could involve using screws, bolts, or adhesive. Follow the manufacturer’s instructions to ensure a secure attachment. Take your time to ensure everything is properly fastened.
This step-by-step installation process will help protect your equipment and prevent heat damage.
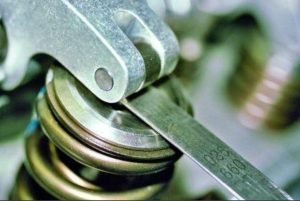
Checking For Secure Mounting
To ensure a secure mounting, carefully inspect the heat shield for stability and tightness. Apply gentle pressure to confirm firm attachment. Check for any signs of looseness or movement. Look for loose bolts or brackets that may need tightening. Inspect the entire heat shield, including the edges and corners, for any signs of damage or wear.
Make sure that all mounting points are properly aligned and fastened securely. Take note of any issues or areas that require attention. Regularly checking and maintaining the heat shield’s secure attachment is essential for optimum performance and safety.
Conducting Temperature Checks
When attaching a heat shield, it is important to conduct temperature checks to ensure proper installation. Running the engine or heat source is necessary to generate heat for a thorough assessment. Thermal imaging or heat-sensitive materials can be used to monitor heat distribution during this process.
These methods help identify hotspots and ensure the heat shield is positioned correctly to protect nearby components. By following these guidelines, you can attach a heat shield effectively and prevent any potential damage caused by excessive heat. Regular temperature checks are crucial to ensure the heat shield performs optimally and provides the desired protection.
Regular Maintenance And Inspection
Regular maintenance and inspection of your heat shield is essential to ensure its effectiveness. Periodically checking for signs of wear or loosening can help prevent potential issues. If you notice any damage or if the heat shield seems loose, re-tightening or repositioning it may be necessary.
Taking proactive measures can help maintain the proper functioning of your heat shield and prolong its lifespan. It’s important to prioritize this maintenance task as it plays a significant role in protecting your vehicle from excessive heat and potential damage.
By incorporating regular checks into your maintenance routine, you can address any potential issues promptly and ensure the continued efficiency of your heat shield. Keep your vehicle in optimal condition by following these guidelines for heat shield maintenance and inspection.
Seeking Professional Assistance
Seeking professional assistance for attaching a heat shield is essential, especially for complex installations or unique applications. A specialist can provide expertise in understanding local regulations and requirements, ensuring compliance. With their knowledge and experience, they can guide you through the process, offering valuable insights that guarantee a successful installation.
By consulting a professional, you can be confident that the heat shield will be attached correctly, providing optimal protection. It’s important to prioritize safety and efficiency when dealing with such installations, and seeking professional help is a prudent choice. So, whether you’re unsure about the regulations or need assistance with a unique application, reaching out to a specialist will ensure a smooth and hassle-free process.
Enjoying The Benefits Of A Properly Attached Heat Shield
A properly attached heat shield can bring numerous benefits to your vehicle. Not only can it enhance the performance of sensitive components, but it can also increase their longevity. Another advantage is the improved safety it provides by protecting against heat-related damage.
By ensuring that the heat shield is securely attached, you can enjoy peace of mind while driving. The shield acts as a barrier, preventing excessive heat from reaching vulnerable parts and reducing the risk of malfunction or failure. This simple yet essential step can make a significant difference in the overall functioning of your vehicle.
So, take the time to attach your heat shield correctly and reap the rewards of improved performance, increased longevity, and enhanced safety.
Frequently Asked Questions For How To Attach A Heat Shield
How Do You Secure A Heat Shield?
To secure a heat shield, follow these steps: 1. Position the heat shield over the desired area. 2. Fasten it securely using bolts or screws. 3. Ensure proper alignment and tightness to prevent any movement. 4. Inspect regularly for any signs of loosening or damage.
Why Does My Heat Shield Keep Coming Loose?
Your heat shield may keep coming loose due to inadequate fastening or worn-out mounting brackets.
What Happens If My Heat Shield Falls Off?
If your heat shield falls off, it can lead to damage, overheating, and potential fire hazards in your vehicle.
Can You Fix Heat Shield Yourself?
Yes, you can fix the heat shield yourself if you follow proper instructions and have the necessary tools.
Conclusion
To sum it up, attaching a heat shield is an essential step in ensuring the safety and efficiency of your vehicle. By following the steps outlined in this guide, you can easily attach a heat shield on your own without the need for professional help.
Remember to start by gathering the necessary tools and equipment and then safely removing the old heat shield. Take careful measurements and use precise techniques when cutting and shaping the new shield. Finally, securely fasten the new heat shield in place, making sure it is properly aligned and tight.
Regularly inspect and maintain your heat shield to ensure it continues to provide the necessary protection. By taking the time to attach a heat shield correctly, you can safeguard your vehicle from excessive heat and extend its lifespan for years to come.
Affiliate Disclosure: As an Amazon Associate, I earn from qualifying purchases made through links on this site.