
I’ve spent countless hours wrenching on my Road Glide, and if there’s one thing I’ve learned about motorcycle audio, it’s that the quality of your installation is everything. A great amplifier is useless if your wires are weak or incompatible. I recently put five popular harley amp wiring kit options through their paces to see which ones truly deliver clean power and simple installation, especially for those complex Harley touring systems. This guide will walk you through the top contenders, focusing on fitment, material quality, and real-world performance.
Contents
- STINGER Harley-Davidson Touring Motorcycles (1998-Present) 2/4 Channel Universal Amplifier Wiring Kit, Direct Fit Wiring, Harley Davidson Road Glide & Street Glide, (SVTK4681)
- DS18 RY-Harness.HD Harley Davidson Plug and Play Harness for Amplifiers, 4 Channel RCA Pre-Output Ready to Use – Great for Upgrade Your Motorcycle Sound System
- BOSS Audio Systems KIT2 8 Gauge Complete Car Amplifier Installation Wiring Kit with Power Cables, Ground Cables, Turn-On Wire, Speaker Wire, Terminals
- DS18 AK4 Complete 4 Gauge CCA Amplifier Installation Wiring Kit – Ampkit Helps Make Connections, Brings Power to Your Radio, Subwoofers, Speakers with Super Flex Wire – 1200W for 1 Amplifier
- RD True 4 Gauge Car Audio Cable Amp Wiring Kit – 2 Channel Rock Direct CCA Power Cable Amplifier Install Wiring Kit
- Comparison Insights: Choosing Your Harley Amp Wiring Kit
- Final Verdict
- Frequently Asked Questions About Harley Amp Wiring Kit
- Why is a specialized harley amp wiring kit better than a standard car kit?
- What does 4 gauge vs. 8 gauge mean for my Harley?
- What is the difference between OFC and CCA wire in an amp wiring kit?
- Do I need an RCA harness converter (like the DS18 RY-Harness) if I keep my factory Harley radio?
- How difficult is it to install a harley amp wiring kit myself?
- Where should I mount the fuse holder on my Harley?
STINGER Harley-Davidson Touring Motorcycles (1998-Present) 2/4 Channel Universal Amplifier Wiring Kit, Direct Fit Wiring, Harley Davidson Road Glide & Street Glide, (SVTK4681)
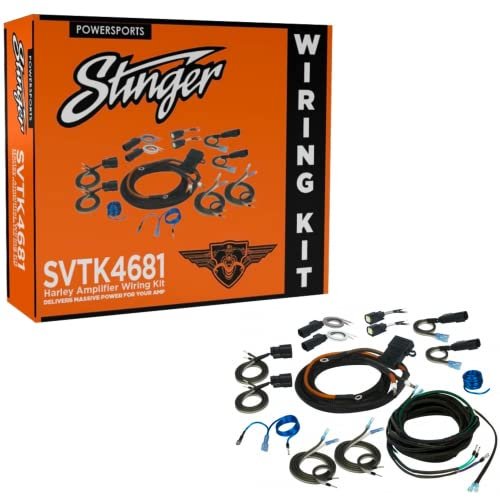
If you’re looking for a wiring solution that feels like it came straight from the factory, the STINGER SVTK4681 is it. This kit is specifically engineered for Harley-Davidson touring bikes, covering models from 1998 up to the current generation. The true magic here is the seamless integration—the pre-terminated ends and the 8-gauge Oxygen-Free Copper (OFC) power cable mean minimal cutting and maximum conductivity. Installing this kit drastically reduces installation time and virtually eliminates the guesswork often associated with custom motorcycle wiring jobs.
Key features that stand out:
– Direct Fit: Engineered specifically for Harley Davidson Road Glide and Street Glide models (1998-Present).
– Optimized Power: Uses high-quality 8GA OFC power and ground wire for superior current delivery.
– Safety: Includes a high-grade 60 amp MAXI fuse and fuse holder designed for reliable protection.
– Convenience: Direct fit wiring with pre-terminated ends with Ferrule connectors.
Pros:
– Exceptional build quality using OFC materials.
– True plug-and-play fitment simplifies the installation process significantly.
– High-quality fusing ensures maximum safety for the electrical system.
– Designed to handle up to four channels of amplification.
Cons:
– Premium price reflects the specialized, bike-specific design and OFC material quality.
Best for: Riders seeking the highest quality, direct-fit solution for modern Harley touring bikes who prioritize ease of installation and power stability.
Expert Opinion: This is the benchmark for a specialized harley amp wiring kit. The OFC wire and exact fitment mean you get clean, consistent power without interference, which is crucial when dealing with tight spaces and high vibrations on a motorcycle.
DS18 RY-Harness.HD Harley Davidson Plug and Play Harness for Amplifiers, 4 Channel RCA Pre-Output Ready to Use – Great for Upgrade Your Motorcycle Sound System
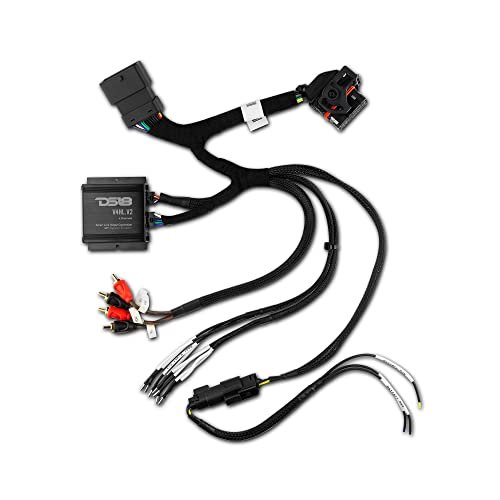
The DS18 RY-Harness.HD isn’t a complete power wiring kit, but it is absolutely essential for anyone upgrading the audio on a 2014 and newer Harley who wants to keep their factory radio. This T-Harness acts as the bridge, allowing you to intercept the speaker signal from the stock head unit and convert it into a low-level RCA pre-output suitable for an aftermarket amplifier or DSP. This eliminates the need for clumsy line output converters (LOCs) and complicated splicing behind the fairing, making the signal connection truly plug-and-play.
Key features that stand out:
– PnP Design: Plug and Play T-Harness fits 2014 – present Harley Davidson Touring models.
– Signal Conversion: Features a High to Low signal converter with load resistors.
– Pre-Outs: Provides 4 Channel RCA Pre-Output Ready to use directly to the amplifier.
– Remote Control: Includes a DSP Power connection with remote output triggered when the radio is on.
Pros:
– Dramatically simplifies the process of getting a clean signal from the factory radio.
– Essential for maintaining fade and balance controls with aftermarket amps.
– Reduces installation complexity and the risk of damaging factory wires.
Cons:
– Does not include the main power/ground wire needed to run the amp from the battery.
Best for: Riders with 2014+ Harley models who need a simple, clean, and reliable way to tap into the factory head unit signal without cutting wires.
Expert Opinion: Most audio issues on upgraded Harley systems stem from poor signal acquisition. This harness solves that entirely. It’s the cleanest way to get a pre-out signal on a modern touring bike, ensuring your amplifier gets the highest quality input possible.
BOSS Audio Systems KIT2 8 Gauge Complete Car Amplifier Installation Wiring Kit with Power Cables, Ground Cables, Turn-On Wire, Speaker Wire, Terminals
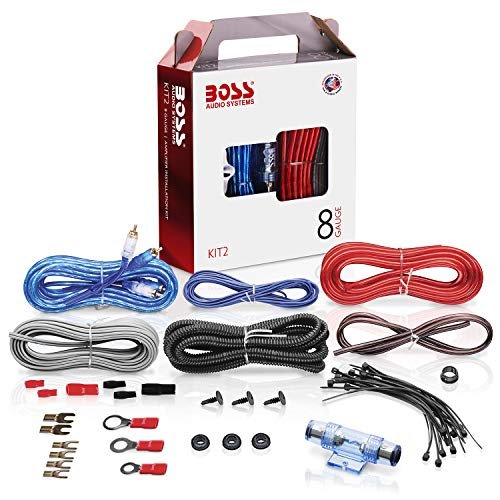
For those running a smaller, 2-channel amplifier or working with a very tight budget, the BOSS Audio Systems KIT2 offers a complete 8-gauge solution. While it’s designed for cars, the included components—like the 20-foot power cable, RCA interconnect, and detailed wire management accessories—make it adaptable for motorcycle use, provided you manage the excess cable. It’s a great entry-level kit that provides the necessary cables to power and connect a modest system upgrade without breaking the bank.
Key features that stand out:
– Comprehensive Kit: Complete 8-gauge setup for amplifier installation.
– Accessories Included: Comes with 20 wire ties and 3 rubber grommets for wire protection and management.
– Cables: Features a 20-foot, 8-gauge red power cable and reliable 16-gauge speaker wire.
– RCA Quality: Equipped with a 20 Foot High-Performance RCA Interconnect for clear audio signals.
Pros:
– Extremely budget-friendly option.
– Includes all the necessary components for a basic amplifier install (power, ground, signal, speaker wire).
– Good supply of wire ties and grommets for protecting runs through the frame.
Cons:
– Being a generic kit, it requires more customization and cutting for proper Harley fitment.
Best for: Budget-conscious riders installing a low-to-medium power 2-channel amplifier where 8-gauge wire is sufficient.
Expert Opinion: This is a solid, economical starter kit. Just be aware that 8-gauge wire is often undersized for high-power applications (above 600W RMS). If your amp is large, you’ll need to step up to a 4-gauge kit to prevent voltage drop.
DS18 AK4 Complete 4 Gauge CCA Amplifier Installation Wiring Kit – Ampkit Helps Make Connections, Brings Power to Your Radio, Subwoofers, Speakers with Super Flex Wire – 1200W for 1 Amplifier
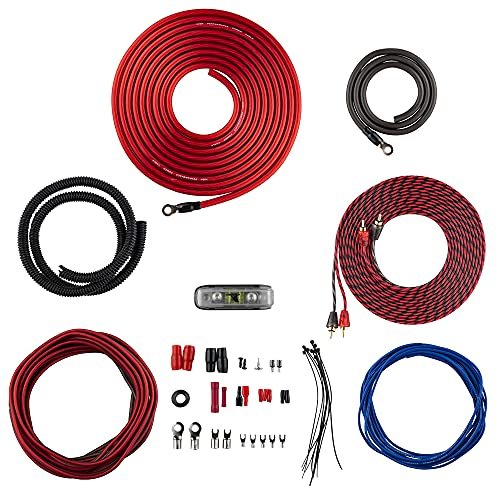
When you need serious power on your bike—especially for running a 4-channel amp or driving loud, power-hungry speakers—4-gauge wiring is the way to go. The DS18 AK4 is a complete 4-gauge Copper-Clad Aluminum (CCA) kit designed to handle systems up to 1200W. The key advantage here is the thick gauge and Super flex twist premium cables, which make routing thick wires through a motorcycle frame significantly easier than with stiff, lower-quality insulation. It includes an ANL fuse holder and all necessary terminals for a robust connection.
Key features that stand out:
– High Power Capacity: 4 Gauge Installation cables rated up to 1200W.
– Safety: Includes an ANL fuse holder with an 80 amp fuse.
– Flexibility: Features Super flex twist premium cables for easier routing.
– Complete Install Kit: Comes with 17ft power cable, ground cable, speaker cable, RCA interconnect, and remote turn/on wire.
Pros:
– 4-gauge wire minimizes voltage drop for high-power amplifiers.
– Excellent cable flexibility simplifies installation in cramped fairings and frames.
– Comes with a heavy-duty ANL fuse holder.
Cons:
– Uses CCA wire rather than the more conductive OFC wire.
Best for: Riders installing high-wattage amplifiers (over 800W RMS) who need thick gauge cable and prioritize flexibility during the installation process.
Expert Opinion: The flexibility of this wire is a huge plus when trying to snake 4-gauge cable through a crowded Harley frame. While it is CCA, the generous thickness of the 4-gauge cabling ensures it can still handle high current demands reliably for most touring setups.
RD True 4 Gauge Car Audio Cable Amp Wiring Kit – 2 Channel Rock Direct CCA Power Cable Amplifier Install Wiring Kit
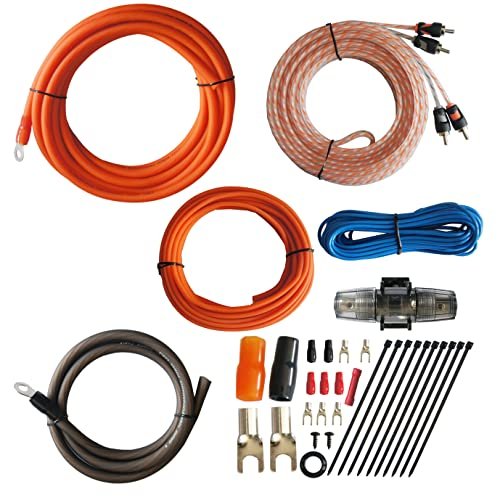
The RD True 4 Gauge kit offers another robust option for high-power installations, focusing on high-quality RCA signal transfer alongside thick power wires. This kit combines a true 4 gauge CCA power and ground wire with a crucial upgrade: a 17ft Tinned OFC (Oxygen Free Copper) 2-Channel Twisted Pair RCA Stereo Signal Cable. By using OFC for the RCA interconnect, this kit minimizes signal interference and noise, providing a cleaner signal to your amp—a common requirement in the noisy electrical environment of a Harley.
Key features that stand out:
– True 4 Gauge: 17ft Power Orange and 3ft Ground Wire Black with Soft Flexible Automotive Grade PVC Jacket.
– OFC RCA: Tinned OFC Oxygen Free Copper 2-Channel Twisted Pair RCA interconnect cable.
– Fusing: Includes a durable ROCKDIRECT 80AMP Mini ANL Fuse-holder and 80AMP fuse.
– Installation Accessories: Includes nickel-plated spade terminals and various connectors for a tidy install.
Pros:
– Robust 4-gauge power handling for large amplifiers.
– Excellent signal quality due to the dedicated OFC twisted-pair RCA cable.
– Soft, flexible jacket on the power wire aids installation.
Cons:
– Power cables are CCA, not full OFC.
Best for: Riders installing high-power systems who are concerned about noise interference and want the best possible RCA signal quality combined with large gauge power cables.
Expert Opinion: This kit’s decision to upgrade the RCA interconnect to Tinned OFC is smart. Signal integrity is often overlooked, but it prevents that annoying engine whine or static. This provides robust power while ensuring a clean sound delivery path.
Comparison Insights: Choosing Your Harley Amp Wiring Kit
When selecting a harley amp wiring kit, you must weigh the convenience of direct fit against power capacity and material quality.
Harley-specific kits like the STINGER and DS18 RY-Harness save hours of splicing because they integrate directly into the factory radio harness or OEM connections, drastically reducing installation time and potential errors.
For smaller 2-channel amp installations or systems under 600W RMS, 8 gauge (like the BOSS KIT2) might suffice, but for high-power systems on a touring bike, 4 gauge kits (DS18 AK4, RD True) are strongly recommended to prevent voltage drop across the length of the run.
The material of the wire matters significantly: while Copper-Clad Aluminum (CCA) kits (BOSS, DS18 AK4) are more affordable, when budget allows, always prioritize Oxygen-Free Copper (OFC) wiring, like that used in the STINGER kit, as it provides superior conductivity and power stability.
The DS18 RY-Harness.HD is unique; it is primarily a signal harness. If you use a generic power kit (like the BOSS or DS18 AK4), you should also consider adding a dedicated Harley signal harness for cleaner audio input.
Final Verdict
Choosing the right harley amp wiring kit depends entirely on your bike year and power demands. We break down the top picks by category:
The Gold Standard (Best Overall Direct Fit): The STINGER SVTK4681 takes the top spot for specialized Harley installs. Its combination of OFC material, exact direct-fit connectors, and all-in-one design makes it worth the premium price for seamless integration and maximum electrical performance.
The Power Player (Best for High Wattage): If you are running an amp over 800W RMS and need 4-gauge reliability, the RD True 4 Gauge Kit is the winner. The inclusion of OFC RCA cables guarantees a clean signal, providing a noticeable benefit over generic high-gauge kits.
The Essential Signal Solution (Best Plug-and-Play RCA): The DS18 RY-Harness.HD is a must-buy for 2014+ Harley owners keeping their factory radio. It solves the critical signal conversion problem cleanly and easily, and should be paired with a high-quality power kit like the STINGER or DS18 AK4.
Frequently Asked Questions About Harley Amp Wiring Kit
Why is a specialized harley amp wiring kit better than a standard car kit?
Specialized kits, like those from STINGER, offer direct-fit harnesses and connectors that integrate perfectly with the OEM wiring and physical constraints of a Harley-Davidson fairing and frame. This not only simplifies installation but also ensures the wires are the correct length and use weather-resistant jackets necessary for motorcycle use, which standard car audio kits often lack.
What does 4 gauge vs. 8 gauge mean for my Harley?
The gauge refers to the thickness of the power and ground wire (lower number means thicker wire). 4 gauge wire is thicker and can safely handle much higher current draw (amps) with less voltage drop over distance. We recommend 4 gauge wiring for any amplifier pushing over 600 watts RMS. 8 gauge kits are usually sufficient only for smaller, low-power 2-channel amplifiers (under 400 watts RMS).
What is the difference between OFC and CCA wire in an amp wiring kit?
OFC (Oxygen-Free Copper) is pure copper wire, offering maximum conductivity and flexibility. CCA (Copper-Clad Aluminum) is aluminum wire coated with a thin layer of copper. OFC is superior in power transmission, resulting in less voltage drop and better overall performance, especially in long or high-power runs. CCA is cheaper, but you typically need a larger gauge of CCA (e.g., 4 gauge CCA) to achieve the performance of a slightly smaller gauge of OFC (e.g., 8 gauge OFC).
Do I need an RCA harness converter (like the DS18 RY-Harness) if I keep my factory Harley radio?
Yes, almost always. Factory Harley radios do not output a low-level RCA signal that aftermarket amplifiers require. They output a high-level (speaker level) signal. An RCA harness converter or T-Harness takes this high-level signal, reduces its voltage, and sometimes conditions it (using load resistors) into the clean, low-level signal an aftermarket amp needs. This prevents distortion and noise.
How difficult is it to install a harley amp wiring kit myself?
The difficulty varies significantly. Using a direct-fit plug-and-play harness (like the STINGER or DS18 signal harness) simplifies the electrical connections dramatically, making it achievable for most DIY riders. Using a generic car audio kit requires more knowledge about splicing, wire routing, and proper terminal crimping, which can increase the complexity.
Where should I mount the fuse holder on my Harley?
The fuse holder, which protects your main power line, must be mounted as close to the battery positive terminal as possible—ideally within 12 to 18 inches. This ensures that the entire length of the power wire is protected in case of a short circuit. On a Harley, this usually means finding a safe, dry spot under the seat or near the battery tray, secured firmly away from heat and moving parts.
Affiliate Disclosure: As an Amazon Associate, I earn from qualifying purchases made through links on this site.