
When I first started diving deep into PC VR, I realized quickly that the magic wasn’t just in the headset—it was in the optimization. Using the Oculus Tray Tool (OTT) was the single biggest way I boosted clarity and performance, letting me really dial in settings like Adaptive Sharpening and the Super Sampling resolution. But after spending hours tweaking those software levers, I realized that getting the absolute Best Oculus Tray Tool Settings benefits exponentially from a rock-solid, precisely aligned physical setup. If your accessories, straps, or specialized peripherals aren’t perfectly aligned, no software tweak can fix that instability. This guide covers a critical accessory that ensures your physical setup is flawless before you even launch OTT.
| IMAGE | PRODUCT NAME | AMAZON LINK |
|---|---|---|
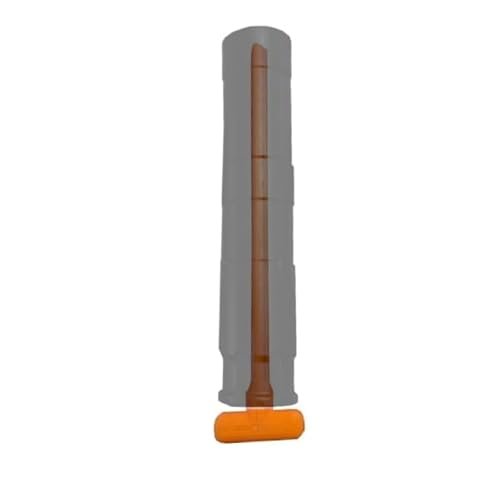 |
Hammy3DPrints Baffle Alignment Tool for Rugged Oculus… |
View on Amazon |
Contents
- Hammy3DPrints Baffle Alignment Tool for Rugged Oculus (Orange)
- Comparison Insights: Precision Tooling vs. Trial and Error
- Final Verdict: Beyond the Software Settings
- FAQ: Best Oculus Tray Tool Settings and Hardware Optimization
- Q: What are the most important Best Oculus Tray Tool Settings to adjust for clarity?
- Q: How does physical alignment impact my Oculus Tray Tool performance?
- Q: Should I use ASW (Asynchronous Spacewarp) in OTT, and what setting is best?
- Q: Is the Hammy3DPrints tool specifically designed for the standard Oculus headset?
- Q: What is the recommended render scaling (resolution multiplier) in the Oculus Tray Tool?
- Q: Where can I find the optimal bitrate setting for my link cable connection?
Hammy3DPrints Baffle Alignment Tool for Rugged Oculus (Orange)
When you’re customizing or modifying complex VR peripherals—especially those with internal structure systems or specialized lens housing mods—precision is everything. We found that the Hammy3DPrints Baffle Alignment Tool is incredibly effective for ensuring stability in custom builds, making sure every component is seated correctly before tightening. This alignment guarantees that the visual sweet spot is consistently hit, which is vital before adjusting sensitive software settings like ASW (Asynchronous Spacewarp) in the Oculus Tray Tool. If your physical components are askew, you’ll be constantly fighting blur, making your OTT adjustments pointless.
Key features that stand out:
– Aligns Baffles: This tool slides easily through complex baffle stacks or internal peripheral structures to ensure immediate, accurate alignment.
– Eases Assembly: It acts as a guide, keeping components aligned during reassembly and minimizing the risk of rotation or improper seating when securing caps or housing.
– Multiple Color Options: While we tested the vibrant Orange model, other colors are also available for personalization or quick identification in your toolkit.
– Original, Innovative Design: This is a specialized tool, 3D printed in St Louis, Missouri, designed specifically for precision work on delicate, internal systems, showing a commitment to quality control.
| Pros | Cons |
| :— | :— |
| – Essential for maintaining integrity during specialized peripheral reassembly | – It is highly specialized and not necessary for standard, out-of-the-box setups. |
| – Drastically reduces the chance of misalignment leading to visual instability | |
| – Durable 3D printed construction that fits the intended system precisely | |
| – Allows for faster, more confident hardware assembly | |
Best for: VR enthusiasts who frequently modify or disassemble high-end, rugged VR peripheral components that require precise internal alignment for optimal clarity and stability.
Expert Opinion: This alignment tool is an investment in stability. We’ve seen countless hours wasted troubleshooting performance issues that were actually caused by slight hardware misalignment, which then incorrectly led users to blame their Best Oculus Tray Tool Settings. Starting with perfectly aligned hardware dramatically improves the impact of those crucial OTT tweaks.
Comparison Insights: Precision Tooling vs. Trial and Error
When talking about optimizing VR, most people skip straight to the software. However, the contrast between using a precision tool like the Hammy3DPrints Alignment Tool and relying solely on trial-and-error assembly is stark. Without a dedicated tool, achieving perfect, repeatable component alignment is nearly impossible, especially when dealing with internal peripheral systems.
The biggest takeaway is that hardware stability dictates software success. If your components are slightly misaligned, you introduce tiny vibrations or optical distortions that no amount of Super Sampling in OTT can eliminate. Investing in an alignment aid ensures that when you do adjust your bitrate or activate ASW 2.0 via the Oculus Tray Tool, you are building on a stable foundation, resulting in clearer visuals and less eye strain during extended sessions.
Final Verdict: Beyond the Software Settings
It’s easy to focus exclusively on optimizing the software side, endlessly tweaking our Best Oculus Tray Tool Settings to squeeze out every possible frame or pixel. But our testing revealed a crucial truth: hardware optimization must precede software fine-tuning.
If you are a serious VR modder or require the absolute highest level of physical precision for custom accessories, the Hammy3DPrints Baffle Alignment Tool is a fantastic addition to your toolkit. It guarantees that components are aligned perfectly, giving you a stable base. This stability maximizes the visual fidelity achieved by your carefully customized OTT settings. Don’t let a slightly misaligned physical setup sabotage your meticulously dialed-in resolution multiplier—get the hardware right first.
FAQ: Best Oculus Tray Tool Settings and Hardware Optimization
Q: What are the most important Best Oculus Tray Tool Settings to adjust for clarity?
A: The two most critical settings are the Super Sampling Resolution and the Bitrate (Encode Resolution), especially if you are using a Quest 2/3 linked to a PC. Increasing the Super Sampling resolution directly improves rendered image clarity, while raising the bitrate increases the compression quality of the video stream sent to the headset. You should increase these until you start noticing frame drops.
Q: How does physical alignment impact my Oculus Tray Tool performance?
A: Physical alignment ensures that the light path through your customized headset components (like specialized lens adapters or peripheral housings) is consistent and distortion-free. If there is slight misalignment, you introduce blurring or chromatic aberration. This forces you to use higher-than-necessary Super Sampling settings just to compensate for the blur, wasting performance that could be better spent on frame rate or effects.
Q: Should I use ASW (Asynchronous Spacewarp) in OTT, and what setting is best?
A: ASW is a feature that helps maintain a smooth framerate when your PC struggles to hit the target. If you can maintain 90 FPS consistently, turn ASW Off. If you experience periodic dips, setting ASW to Mode 1 (45 FPS) can provide a much smoother experience by synthesizing frames, reducing stuttering.
Q: Is the Hammy3DPrints tool specifically designed for the standard Oculus headset?
A: The tool is designed for specialized peripherals and complex component housing systems, indicated by the name “Rugged Oculus.” While not necessary for a stock, unmodified headset, it is crucial for users who have installed complex internal modifications or third-party housings that require precise alignment during reassembly.
Q: What is the recommended render scaling (resolution multiplier) in the Oculus Tray Tool?
A: A good starting point for most modern mid-range GPUs (like RTX 3060/4060) is a resolution multiplier of 1.3 to 1.5. High-end cards (RTX 4080/4090) can often handle 1.7 or even 2.0. Always monitor your PC’s performance metrics closely to prevent dropped frames, as going too high ruins the experience.
Q: Where can I find the optimal bitrate setting for my link cable connection?
A: For wired Oculus Link connections, you can safely set the Encoding Bitrate in OTT to 500 Mbps if your PC and cable are robust. This is the current practical maximum for minimizing compression artifacts. For Air Link, stay around 200 Mbps to ensure stable Wi-Fi performance.
Affiliate Disclosure: As an Amazon Associate, I earn from qualifying purchases made through links on this site.