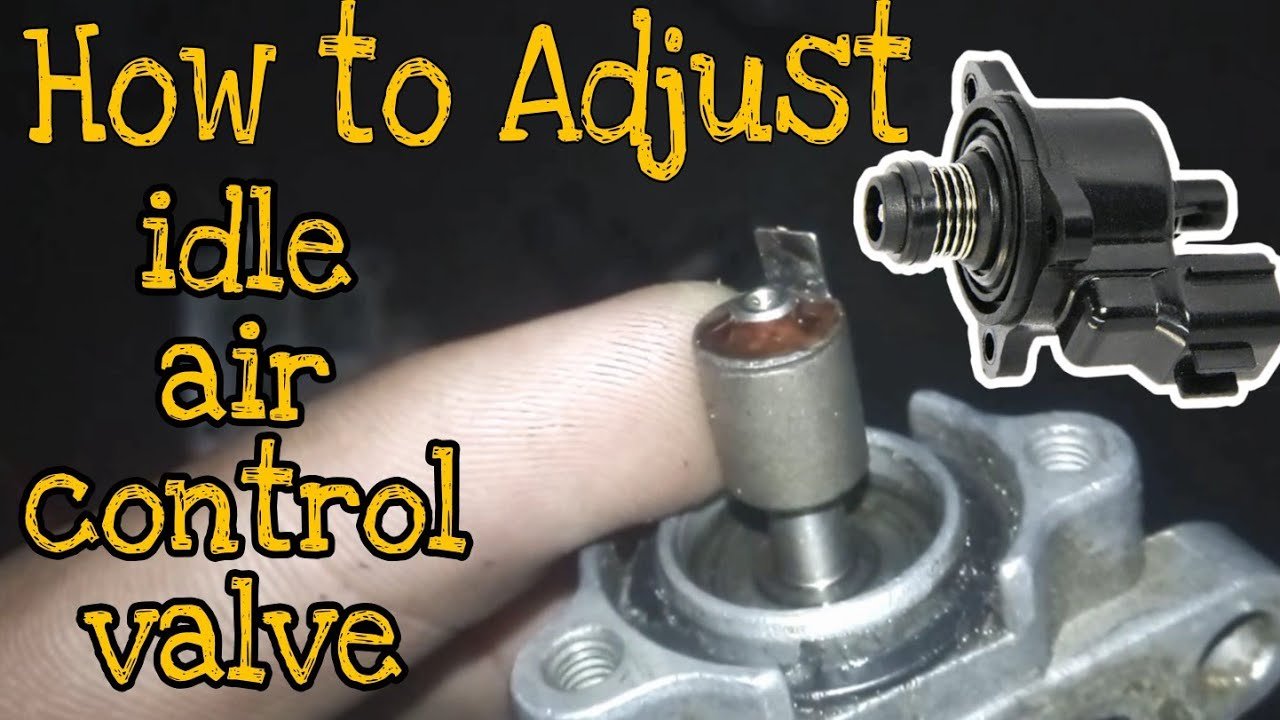
To adjust the idle air control valve on a Honda, locate the valve, remove the screws, adjust the valve using a voltage meter, and tighten the screws. Proper adjustment will help maintain a steady idle speed for the Honda engine.
Contents
- Understanding Idle Air Control Valve Honda
- Signs Of A Faulty Idle Air Control Valve
- Tools And Materials Needed
- Step 1: Safety Precautions
- Step 2: Locating The Idle Air Control Valve
- Step 3: Removing The Idle Air Control Valve
- Step 4: Cleaning The Idle Air Control Valve
- Step 5: Adjusting The Idle Air Control Valve
- Step 6: Reinstalling The Idle Air Control Valve
- Step 7: Reconnecting The Battery
- Step 8: Testing The Idle Air Control Valve
- Is the process of adjusting the idle control valve similar for different car models such as Honda and Chevy?
- Faqs (Optional)
- Frequently Asked Questions For How To Adjust Idle Air Control Valve Honda
- Conclusion
Prime Day Pick
Limited-time Prime Day price. Check current discount on Amazon.
Idle air control valve adjustment plays a crucial role in maintaining the optimal idle speed for Honda engines. With the idle air control valve properly adjusted, the engine can run smoothly and efficiently at idle without stalling or experiencing irregular idle speed fluctuations.
We will guide you through the process of adjusting the idle air control valve on a Honda. By following these steps, you can ensure that your Honda engine operates at its best, improving overall performance and reducing potential issues caused by erratic idle speeds. Let’s dive into the simple and effective method of adjusting the idle air control valve on a Honda.
Prime Day Pick
Limited-time Prime Day price. Check current discount on Amazon.
Understanding Idle Air Control Valve Honda
An idle air control valve is a key component in a Honda vehicle’s engine system. It regulates the amount of air that enters the engine when the vehicle is idling, ensuring the proper air-fuel mixture for smooth operation. Without a functioning idle air control valve, a Honda vehicle may experience issues such as rough idling, stalling, or even difficulty starting.
Prime Day Pick
Limited-time Prime Day price. Check current discount on Amazon.
The idle air control valve works in conjunction with the engine’s computer system to maintain the correct engine speed and idle stability. If the valve becomes dirty or malfunctions, it can disrupt this process, leading to performance problems. Regular maintenance and cleaning of the idle air control valve are crucial to keep a Honda vehicle running smoothly.
Understanding the role and importance of the idle air control valve is essential for maintaining the optimal performance of your Honda.
Signs Of A Faulty Idle Air Control Valve
The idle air control valve (IAC valve) in a Honda plays a crucial role in regulating the engine’s idle speed. If this valve malfunctions, certain signs indicate a problem. One of these signs is rough idling, which is characterized by the engine running unevenly or vibrating excessively at idle.
Another indication of a faulty IAC valve is engine stalling, where the engine abruptly shuts off while idling or coming to a stop. Additionally, a high or low idle speed is a common symptom of an IAC valve issue. These problems can arise due to a clogged or damaged valve, causing disruptions in the airflow to the engine.
If you notice any of these signs, it is crucial to address the issue promptly to avoid further damage to your engine. Regular maintenance and cleaning of the IAC valve are important for optimal engine performance.
Tools And Materials Needed
To adjust the idle air control valve on a Honda, you will need a socket wrench set, a clean cloth, and throttle body cleaner. Begin by locating the idle air control valve, which is usually positioned on or near the throttle body.
Use the socket wrench to loosen the bolts securing the valve. Once the valve is loose, carefully remove it from the throttle body. Inspect the valve for any dirt or debris, using the clean cloth to wipe it clean if necessary.
Take the throttle body cleaner and spray it onto the valve, thoroughly cleaning all sides. Allow the valve to air dry completely before reattaching it to the throttle body and tightening the bolts. Testing the vehicle’s idle should be done afterwards to ensure proper adjustment.
Step 1: Safety Precautions
Park the vehicle in a well-ventilated area and disconnect the negative battery terminal before proceeding. This is an important safety precaution to ensure your well-being and prevent any electrical mishaps. Taking these steps will help create a safe working environment for adjusting the idle air control valve on your Honda.
By carefully following these guidelines, you can confidently carry out the necessary adjustments. Remember to always prioritize safety and take the necessary precautions when working with any car components. With the right approach and attention to detail, you will be able to successfully adjust the idle air control valve on your Honda in no time.
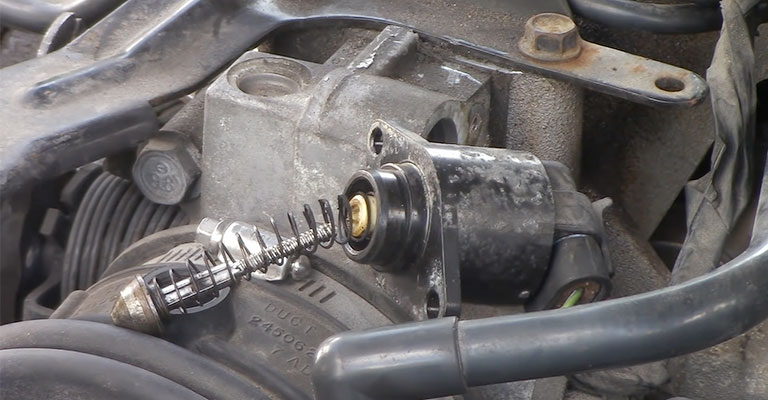
Step 2: Locating The Idle Air Control Valve
Locating the Idle Air Control Valve in your Honda is crucial for adjusting it properly. Refer to the vehicle manual to find its specific location. Generally, you will find it near the throttle body or intake manifold. Identifying the exact spot will make the adjustment process easier.
Whether you need to clean or replace the valve, having the right location is essential. Take your time to consult the manual and ensure you are targeting the correct component. By following these steps, you can effectively adjust the Idle Air Control Valve in your Honda for optimal performance.
Step 3: Removing The Idle Air Control Valve
To remove the idle air control valve from your Honda, use a socket wrench to loosen the mounting screws. Carefully extract the valve from the intake manifold once the screws are removed.
Step 4: Cleaning The Idle Air Control Valve
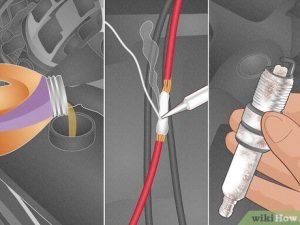
To clean the Idle Air Control Valve on a Honda, spray throttle body cleaner onto a clean cloth. Carefully clean the valve, ensuring to remove any dirt or debris that may have built up over time. This step is crucial in maintaining the optimal performance of the valve and the overall functionality of the Honda vehicle.
By regularly cleaning the Idle Air Control Valve, you can prevent any potential issues that may arise from dirt or debris clogging the valve. Taking the time to clean this valve is a simple yet effective way to ensure that your Honda runs smoothly and efficiently.
Keep in mind that this is just one step in the larger process of adjusting the Idle Air Control Valve on a Honda, but it is an important one to maintain the health of your vehicle.
Credit: hondatheotherside.com
Step 5: Adjusting The Idle Air Control Valve
To adjust the idle air control valve on a Honda, start by locating the adjustment screw on the valve. Once found, turn the screw clockwise to increase idle speed or counterclockwise to decrease it. This adjustment will help optimize the engine’s idle performance and ensure smooth operation.
It’s important to make small adjustments and test the idle speed after each one, as even slight changes can have a significant impact. By following these steps, you’ll be able to properly adjust the idle air control valve on your Honda and maintain its optimal performance.
Step 6: Reinstalling The Idle Air Control Valve
To adjust the idle air control valve on a Honda, follow these steps. In step 6, after cleaning the valve, it’s time to reinstall it. Place the valve back into the intake manifold. Then, secure it with the mounting screws using a socket wrench.
This ensures that the valve is properly attached and functioning correctly. Adjusting the idle air control valve is an important maintenance task for optimal engine performance. By following these simple steps, you can ensure that your Honda runs smoothly and efficiently.
Remember to always refer to your vehicle’s manual for specific instructions and safety precautions. Keep your Honda in top shape by regularly maintaining and adjusting the idle air control valve.
Step 7: Reconnecting The Battery
After completing the previous steps, it’s time to reconnect the negative battery terminal. Make sure to attach it securely to ensure a proper connection. Take care not to overtighten the terminal, as this could damage the battery or the terminal itself.
Once the terminal is securely attached, you can move on to the next step in adjusting the idle air control valve on your Honda. Following these steps will help ensure that your Honda runs smoothly and efficiently. Keeping up with regular maintenance and addressing any issues promptly will help extend the life of your vehicle.
Step 8: Testing The Idle Air Control Valve
To adjust the idle air control valve on a Honda, proceed to step eight by testing it. Start the engine and carefully observe the idle speed. Ensure that it falls within the range recommended by the manufacturer.
Is the process of adjusting the idle control valve similar for different car models such as Honda and Chevy?
Yes, the process of adjusting idle on Chevy 350 and Honda models can be quite similar. Both typically involve locating the idle control valve, making the necessary adjustments to the idle speed screw, and testing the results. However, it’s always a good idea to consult the specific vehicle’s manual for accurate instructions.
Faqs (Optional)
A faulty idle air control valve can lead to poor fuel efficiency, affecting your car’s overall performance. Cleaning the idle air control valve regularly can help prevent this issue. However, the frequency of cleaning depends on various factors such as driving conditions and maintenance habits.
It is recommended to consult a professional for idle air control valve adjustment to ensure proper functioning and avoid any potential damage. Professional expertise can help diagnose and address any underlying problems accurately. So, seeking professional assistance is advisable to maintain your Honda’s idle air control valve in optimal condition.
Frequently Asked Questions For How To Adjust Idle Air Control Valve Honda
Can Iac Valve Be Adjusted?
Yes, the IAC valve can be adjusted for optimal performance.
What Are The Symptoms Of A Failing Idle Air Control Valve?
Symptoms of a failing idle air control valve include rough idling, stalling, and fluctuating RPMs.
How To Adjust The Iacv?
To adjust the IACV, follow these steps: 1. Locate the IACV on your vehicle. 2. Use a screwdriver to adjust the idle air control valve. 3. Turn the screw clockwise to increase idle speed, and counterclockwise to decrease it. 4. Test the idle speed by starting the engine and observing the RPM gauge.
5. Repeat the adjustment process until the desired idle speed is achieved. Remember to consult your vehicle’s manual for specific instructions related to your make and model.
How Do I Fix My Honda Idle Problem?
To fix your Honda idle problem, check for any clogged air filters or vacuum leaks. Clean or replace them accordingly.
Conclusion
After following the step-by-step guide on how to adjust the idle air control valve on your Honda, you should now have a smooth idling engine and improved fuel efficiency. Remember to always consult your vehicle’s manual for specific instructions and safety precautions.
Regularly maintaining and adjusting your idle air control valve is crucial for optimal engine performance. By taking the time to understand and follow the process outlined in this blog post, you can save money on expensive repairs and prolong the lifespan of your Honda.
So don’t hesitate to roll up your sleeves and get your hands dirty with this simple but effective DIY maintenance task. Enjoy the benefits of a properly adjusted idle air control valve, and happy driving!
Affiliate Disclosure: As an Amazon Associate, I earn from qualifying purchases made through links on this site.