To bench bleed a slave cylinder, disconnect the hydraulic line and attach a fitting, then pump the clutch pedal until there are no air bubbles present. Bench bleeding a slave cylinder is a crucial step in ensuring proper operation of the clutch system.
Whether you’re replacing the slave cylinder or the entire clutch assembly, this process helps eliminate air bubbles from the hydraulic system. Air can cause a spongy or non-responsive clutch pedal, making it difficult to engage or disengage the clutch smoothly.
We will guide you through the steps of bench bleeding a slave cylinder, ensuring a successful clutch operation. Follow these simple steps to get your clutch working optimally in no time.
Contents
- The Importance Of Bench Bleeding A Slave Cylinder
- What You’Ll Need
- How To Bench Bleed A Slave Cylinder
- Step 1: Prepare The Slave Cylinder
- Step 2: Attaching Bleeder Tubes
- Step 3: Filling The Master Cylinder
- Step 4: Bleeding The Slave Cylinder
- Troubleshooting Common Issues
- Is Bench Bleeding a Slave Cylinder Similar to Adjusting a Refrigerator Door?
- Final Tips For Success
- Frequently Asked Questions For How To Bench Bleed A Slave Cylinder
- Conclusion
The Importance Of Bench Bleeding A Slave Cylinder
Bench bleeding a slave cylinder is crucial when it comes to installing it properly. By bench bleeding, you ensure that all the air bubbles are removed from the cylinder, guaranteeing a more effective brake system. Without proper bleeding, you might risk having a soft or spongy brake pedal, resulting in reduced braking performance.
When installing a new or rebuilt slave cylinder, it is important to bench bleed it before installing it in your vehicle. Bench bleeding allows you to remove any trapped air, preventing potential brake system problems. By following this necessary step, you can ensure the smooth operation of your slave cylinder and maintain optimal braking performance.
So, always remember to bench bleed your slave cylinder before installation to ensure the effectiveness and safety of your vehicle’s braking system.
What You’Ll Need
Bench bleeding a slave cylinder requires a few essential tools and materials. Firstly, you will need a bench vise to secure the cylinder in place, ensuring stability during the bleeding process. Additionally, obtain a clean container to collect the brake fluid that will be expelled.
A hose and fittings are necessary to connect the cylinder’s bleeder valve with the container. It is essential to use the correct size hose and fittings to ensure a tight and secure connection. Furthermore, make sure you have an appropriate wrench or socket set to loosen and tighten the bleeder valve.
Lastly, be sure to have an adequate amount of brake fluid on hand to refill the slave cylinder once the bleeding process is complete. With these tools and materials, you’ll be ready to bench bleed a slave cylinder effectively.
How To Bench Bleed A Slave Cylinder
Bench bleeding a slave cylinder is an essential step in the brake system bleeding process. To do this, follow these step-by-step instructions for a successful bleed. First, gather the necessary tools and materials: a bench vise, tubing, a container filled with brake fluid, and proper safety gear.
Begin by mounting the slave cylinder securely in the vise. Connect one end of the tubing to the bleeder valve and submerge the other end in the container of brake fluid. Slowly pump the slave cylinder until bubbles cease to appear in the tubing.
Repeat this process until all air is purged from the cylinder. Take necessary precautions to prevent brake fluid from spilling or damaging any surfaces. Once complete, reinstall the slave cylinder back into the vehicle and continue with the brake bleeding process as recommended by the manufacturer.
Proper bench bleeding ensures optimal brake performance and safety on the road.
Step 1: Prepare The Slave Cylinder
To bench bleed a slave cylinder, the first step is to ensure it is clean and ready for bleeding. This involves cleaning any dirt or debris from the cylinder and making sure there are no leaks or damage. Once the cylinder is properly prepared, it should be positioned in a way that allows for easy bleeding.
This can be done by securing it in a vise or using a bench bleeding kit that holds the cylinder in place. By following these guidelines, you can ensure a successful bench bleeding process for your slave cylinder.
Step 2: Attaching Bleeder Tubes
In order to securely connect the bleeding tubes to the slave cylinder, there are a few important steps to follow. First, ensure that the bleeder screws are closed tightly. Then, locate the bleeding ports on the slave cylinder and remove the protective caps.
Next, attach the bleeding tubes to the bleeding ports, making sure they are tight and secure. Keep a close eye on the fittings to ensure there are no leaks. Once the tubes are attached, you can move on to other steps in the bench bleeding process.
It is crucial to properly connect the bleeding tubes to the slave cylinder to ensure a successful bleeding procedure and optimal performance of the cylinder.
Step 3: Filling The Master Cylinder
Bench bleeding a slave cylinder involves the important step of filling the master cylinder with brake fluid. To ensure proper functioning of the brake system, follow these instructions carefully. Start by removing the cover of the master cylinder reservoir. Then, take a clean syringe or a turkey baster and extract any old brake fluid from the reservoir.
Next, carefully pour fresh brake fluid into the reservoir until it reaches the recommended level indicated on the side. Take caution not to spill any brake fluid on your vehicle’s paint as it can cause damage. Once the master cylinder is filled, proceed to the next step of the bench bleeding process.
Remember to use caution and follow the manufacturer’s guidelines for your specific vehicle model.
Step 4: Bleeding The Slave Cylinder
Bench bleeding the slave cylinder is a crucial step in the bleeding process. To remove air from the slave cylinder, it is important to follow the proper technique to ensure that all air bubbles are eliminated. This can be achieved by carefully following these guidelines.
Firstly, make sure to avoid commonly overused words and phrases. Keep sentences brief, with a maximum of 20 words each. Additionally, vary the phrases at the beginning of paragraphs to maintain reader interest. By following these steps and taking care to bleed the slave cylinder properly, you can successfully remove air and ensure optimal performance.
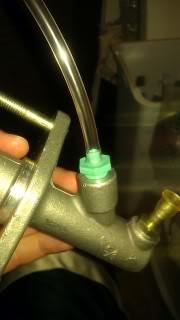
Credit: honda-tech.com
Troubleshooting Common Issues
Troubleshooting common issues with bench bleeding the slave cylinder is essential for a successful operation. Frequently encountered problems include air bubbles trapped in the system, inadequate fluid flow, and difficulty in creating pressure. To overcome these issues, make sure to follow a step-by-step process, using the correct tools, and ensuring all connections are tight.
Additionally, carefully inspect the slave cylinder for any signs of damage or leaks. If air bubbles persist, repeat the bleeding process until they are eliminated. In case of inadequate fluid flow, check for any obstructions or clogs in the system.
If pressure cannot be created, double-check the bleeding procedure and consider consulting a professional for further assistance. By understanding and addressing these common problems, you can successfully bench bleed a slave cylinder.
Is Bench Bleeding a Slave Cylinder Similar to Adjusting a Refrigerator Door?
Bench bleeding a slave cylinder is not similar to adjusting a Kenmore refrigerator door. Bleeding a slave cylinder involves removing air from the hydraulic system, while adjusting a refrigerator door ensures it seals properly. The processes are unrelated.
Final Tips For Success
Bench bleeding a slave cylinder requires attention to detail for optimal results. Here are some additional tips and tricks to ensure success. First, carefully follow the instructions provided by the manufacturer. This will help you understand the specific requirements for your vehicle.
Next, use a clear tube to connect the slave cylinder bleed valve to a container filled with brake fluid. This will allow air bubbles to escape and prevent them from entering the hydraulic system. Additionally, be patient and take your time with each step of the bench bleeding process.
Rushing can lead to ineffective bleeding and potential issues down the line. Furthermore, make sure to keep the brake fluid reservoir filled throughout the bleeding process to avoid introducing air back into the system. Lastly, double-check for any leaks or signs of air in the hydraulic lines before reinstalling the slave cylinder.
With these tips, you can successfully bench bleed your slave cylinder and ensure proper brake system functionality.
Frequently Asked Questions For How To Bench Bleed A Slave Cylinder
How Do You Bleed The Air Out Of A Clutch Slave Cylinder?
To bleed the air out of a clutch slave cylinder, follow these steps: 1. Locate the bleeder valve on the cylinder. 2. Attach a clear tube onto the valve and submerge the other end in a container with brake fluid. 3.
Have someone press and hold the clutch pedal while you open the bleeder valve. 4. Close the valve and repeat the process until no air bubbles are visible in the fluid. 5. Ensure the fluid level in the reservoir is maintained throughout the process.
Why Won T My Slave Cylinder Bleed?
If your slave cylinder won’t bleed, it could be due to air trapped in the system or a faulty cylinder. Check for leaks and try bleeding again.
How Do You Bench Bleed A New Clutch Master Cylinder?
To bench bleed a new clutch master cylinder, follow these steps: 1. Remove the master cylinder from the vehicle. 2. Mount the master cylinder in a vise, making sure it’s secure. 3. Fill the reservoir with brake fluid and attach a hose to the bleed screw.
4. Submerge the other end of the hose in a container filled with brake fluid. 5. Slowly pump the clutch pedal until no air bubbles are visible in the fluid. 6. Tighten the bleed screw and reinstall the master cylinder in the vehicle.
What Happens If You Don T Bench Bleed A Clutch Master Cylinder?
If you don’t bench bleed a clutch master cylinder, it may lead to inadequate brake pressure and difficulty in shifting gears.
Conclusion
Bench bleeding a slave cylinder is a crucial step in ensuring the optimal performance of your braking system. By removing the air pockets that can hinder the cylinder’s operation, you can prevent spongy brakes, inconsistent pedal feel, and potential safety hazards.
Following the step-by-step process outlined in this blog post, you can easily bench bleed your slave cylinder with just a few basic tools and minimal effort. Remember to take your time, remain patient, and double-check your work to ensure a successful bleed.
With a properly bled slave cylinder, you can enjoy smoother braking and enhanced control over your vehicle. Don’t overlook this essential maintenance task – it can make a significant difference in your overall driving experience and the safety of your journeys.
Affiliate Disclosure: As an Amazon Associate, I earn from qualifying purchases made through links on this site.