I’ve spent countless hours tweaking visual fidelity in VR, and using the Oculus Debug Tool Best Settings is absolutely crucial for getting the most visual quality and lowest latency out of my setup. But software configurations are only half the battle; hardware optimization and maintenance matter just as much. I decided to put three very different but essential VR accessories and tools through their paces to see how much they improve the overall VR experience when paired with optimized Debug Tool configurations.
Contents
- Hammy3DPrints Baffle Alignment Tool for Rugged Oculus (Orange)
- Ceozon Joystick Replacement Repair Tools Kit with Screwdriver Tweezer Pry Tool Accessories Compatible with Oculus Meta Quest 2 Controller
- Oculus Sensor (Includes 16Ft. Repeater Cable)
- Helpful Comparison Short Insights
- Final Verdict
- Oculus Debug Tool Best Settings: Comprehensive FAQ
- Q1: What is the main purpose of the Oculus Debug Tool (ODT)?
- Q2: Which setting in the ODT has the biggest impact on visual clarity for PC VR users?
- Q3: How do the best settings in the ODT relate to controller stick drift?
- Q4: What are the risks of using extremely high encoding bitrate settings in the ODT for Air Link?
- Q5: How can a third Oculus Sensor improve my ODT-optimized VR session?
- Q6: If I use a precision tool (like the Hammy3DPrints tool) for internal repairs, what ODT settings should I prioritize afterward?
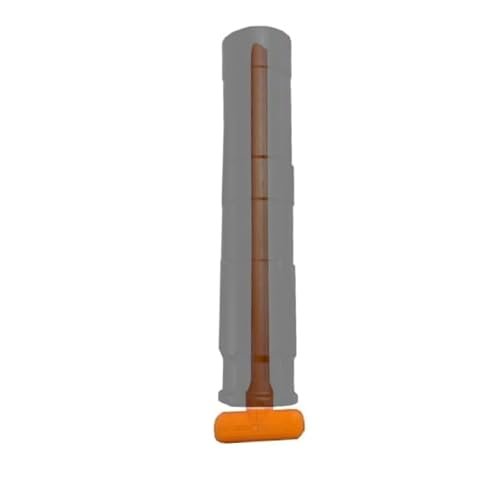
Hammy3DPrints Baffle Alignment Tool for Rugged Oculus (Orange)

While the name suggests a highly specific use, the Hammy3DPrints tool represents precision—a concept vital for any advanced VR modder or DIY enthusiast working with sensitive components like lenses or tracking rings. This tool is designed to ensure internal parts stay perfectly straight during assembly, eliminating potential issues caused by rotational misalignment. For users who frequently disassemble or modify their headset components, ensuring microscopic accuracy is key to maintaining optimal performance, especially when aiming for low-latency visual clarity via custom Oculus Debug Tool Best Settings.
Key features that stand out:
– Aligns Baffles: Slides through components to easily align them during complicated reassembly.
– Eases Assembly: Simplifies the process of putting complex stacks of components back together.
– Multiple Color Options: While Orange is featured, many other colors are also available for personalization.
– Original, Innovative Design: 1000+ products designed and 3D printed, showcasing commitment to bespoke, detailed tools.
Pros:
– Provides essential precision for aligning delicate internal parts.
– Ideal for users engaging in advanced headset modifications.
– Custom options available upon request if specific dimensions are needed.
Cons:
– Highly specialized use case; not necessary for standard users.
Best for: Advanced VR modders, enthusiasts who perform internal hardware upgrades, and those focused on minute component precision.
Expert Opinion: Precision alignment tools like this ensure that modifications or repairs don’t introduce physical inconsistencies that could negatively impact tracking or optical clarity, which would negate any gains made through the Debug Tool.
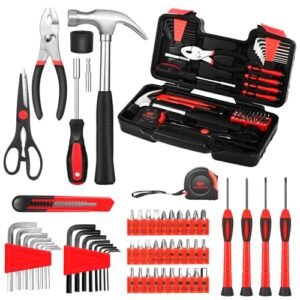
Ceozon Joystick Replacement Repair Tools Kit with Screwdriver Tweezer Pry Tool Accessories Compatible with Oculus Meta Quest 2 Controller

Stick drift is the enemy of immersion, and when you’re running high refresh rates optimized via the Debug Tool, poor input precision is immediately noticeable. This dedicated repair kit offers a practical solution for fixing one of the most common VR hardware failures: controller joystick drift. The kit includes specialized tools required to safely open and repair the Meta Quest 2 controllers without damaging the delicate housing or screws. It’s an incredibly valuable investment for anyone wanting to maintain peak tracking performance without buying a whole new controller set.
Key features that stand out:
– Compatible with: Professional disassembly kit designed specifically for Meta Quest 2 controller joysticks only.
– Tools designed specifically for the Meta Quest 2’s unique screws and components: Protects delicate electronics and plastic housing.
– Necessary repair tool kit: Makes repairing stick drift straightforward for the DIYer.
– Hidden Screwdriver Bits: Pull out the lid of the screwdriver top to find five different bits inside the handle.
Pros:
– Complete set designed specifically for the Quest 2 ecosystem.
– Allows for cost-effective repair of stick drift.
– Protects the controller housing during disassembly using specialized pry tools.
Cons:
– Requires patience and technical confidence to perform the repair correctly.
Best for: Quest 2 users experiencing controller drift who prefer a DIY approach to maintenance.
Expert Opinion: Maintaining controller fidelity is crucial. If your joysticks are failing, even setting the Oculus Debug Tool Best Settings won’t compensate for inaccurate analog input. This kit provides the necessary resources to restore critical input precision.
Oculus Sensor (Includes 16Ft. Repeater Cable)

For users still relying on the classic Oculus Rift or Rift S setup, tracking coverage is king. While modern headsets handle tracking internally, those utilizing external sensors need maximum coverage to prevent latency spikes or temporary loss of tracking—issues that the Debug Tool can help diagnose but not fix. Adding a third Oculus Sensor significantly enhances 360-degree and room-scale tracking, eliminating dead zones and providing a consistently stable environment essential for competitive or active VR experiences. The included repeater cable ensures you have the necessary reach for complex room setups.
Key features that stand out:
– Oculus Sensor tracks constellations of IR LED’s to translate your movements accurately.
– 360 degree and room scale tracking are only supported for 3 sensor configurations (Requires two previous sensors).
– Ideal for most setups and its standard 1/4 20 mount works seamlessly with most existing tripods or wall mounts.
– Includes 16Ft. Repeater Cable to ensure sufficient distance coverage without signal loss.
Pros:
– Drastically improves tracking consistency and reliability in large spaces.
– Essential upgrade for achieving true room-scale with legacy Rift systems.
– Standard mounting thread allows for flexible placement.
Cons:
– Primarily useful only for older Oculus Rift hardware systems.
Best for: Oculus Rift or Rift S users looking to upgrade their tracking setup to achieve flawless room-scale movement.
Expert Opinion: Tracking data directly feeds into the metrics visible in the Debug Tool. If you are experiencing high late-stage tracking latency, adding a third sensor is the most reliable hardware fix for maximizing your tracking volume and stability.
Helpful Comparison Short Insights
These three products highlight that “best settings” often means maintaining your equipment just as much as tweaking software. The Oculus Sensor is critical for users who need a stable physical environment; it directly impacts tracking fidelity, which you can monitor under performance headers in the Debug Tool. If you are struggling with poor positional tracking, no amount of bitrate adjustment can fix it.
Conversely, the Ceozon Repair Kit focuses on input accuracy. Stick drift isn’t a Debug Tool problem; it’s a hardware malfunction. Having the right tools means you can quickly return your controllers to their factory precision, preventing inaccurate in-game movements that break immersion. This DIY approach is often more economical than replacing the entire unit.
Finally, the Hammy3DPrints tool is for a very specific, niche user: the one who takes things apart. This type of precision tool ensures that complex assembly remains accurate, minimizing the risk of causing new optical or mechanical flaws after an internal modification. It’s all about preserving integrity during advanced repairs.
Final Verdict
When evaluating these tools, we look at their necessity for a stable, high-fidelity VR experience, especially when attempting to push performance limits using the Oculus Debug Tool.
Must-Have for Longevity: The Ceozon Joystick Repair Tools Kit gets the highest recommendation for most Quest 2 users. Stick drift is a near-inevitable problem, and being able to fix it cheaply and safely is paramount to maintaining long-term playability.
Essential for Tracking Fidelity (Legacy Systems): If you are running an older Rift setup and struggling with “guardian system” warnings or tracking drops, the Oculus Sensor is a non-negotiable requirement for optimal performance.
Niche Precision Investment: The Hammy3DPrints Baffle Alignment Tool is an investment only for serious enthusiasts or professionals performing extremely detailed mechanical modifications. Its value lies purely in precision alignment that prevents post-modification errors.
Oculus Debug Tool Best Settings: Comprehensive FAQ
Q1: What is the main purpose of the Oculus Debug Tool (ODT)?
The Oculus Debug Tool is a powerful utility used to override default headset settings, allowing advanced users to manually control rendering metrics like pixel density (Supersampling), link sharpening, and the maximum encoding bitrate (if using Oculus Link/Air Link). Its primary purpose is to fine-tune visual quality and latency beyond what is available in the standard Oculus settings panel.
Q2: Which setting in the ODT has the biggest impact on visual clarity for PC VR users?
The setting with the most dramatic impact is usually Pixel Per Display Pixel Override (often referred to as Supersampling). Raising this value (e.g., from 0 to 1.3 or higher) renders the image at a higher resolution than the screen resolution, which is then downscaled. This significantly reduces jaggies and improves image sharpness, though it requires substantial GPU power.
Q3: How do the best settings in the ODT relate to controller stick drift?
The ODT manages visual performance (rendering, bitrate, latency) but has no direct control over physical hardware degradation like controller stick drift. If you are maximizing visual quality with the ODT, but your controller has drift, the input instability will still ruin your experience. Tools like the Ceozon repair kit are required to address this hardware issue separately.
Q4: What are the risks of using extremely high encoding bitrate settings in the ODT for Air Link?
While increasing the encoding bitrate (under the Oculus Link settings) improves image quality by reducing compression artifacts, setting it too high (e.g., above 300 Mbps) can introduce network latency and stuttering. This happens if your PC’s encoder, Wi-Fi router, or the headset’s decoder chip cannot handle the volume of data quickly enough. Always test increases gradually to find your stable maximum.
Q5: How can a third Oculus Sensor improve my ODT-optimized VR session?
For Rift/Rift S users, a stable three-sensor configuration ensures consistent, low-latency positional tracking across your entire play space. When tracking is poor, the headset often has to estimate position, leading to latency spikes and visual hitches. By eliminating tracking dead zones with a third sensor, you are providing the cleanest input data possible, allowing the ODT’s optimized rendering settings to display without interruption.
Q6: If I use a precision tool (like the Hammy3DPrints tool) for internal repairs, what ODT settings should I prioritize afterward?
If you have performed internal repairs or component swaps, your primary focus should be on optical alignment and stability. You should prioritize ODT settings that maximize clarity, such as Pixel Per Display Pixel Override, and check the ODT’s performance overlay metrics (like App Motion-to-Photon Latency) to confirm the internal repair hasn’t introduced any new rendering bottlenecks or tracking delay.
Affiliate Disclosure: As an Amazon Associate, I earn from qualifying purchases made through links on this site.