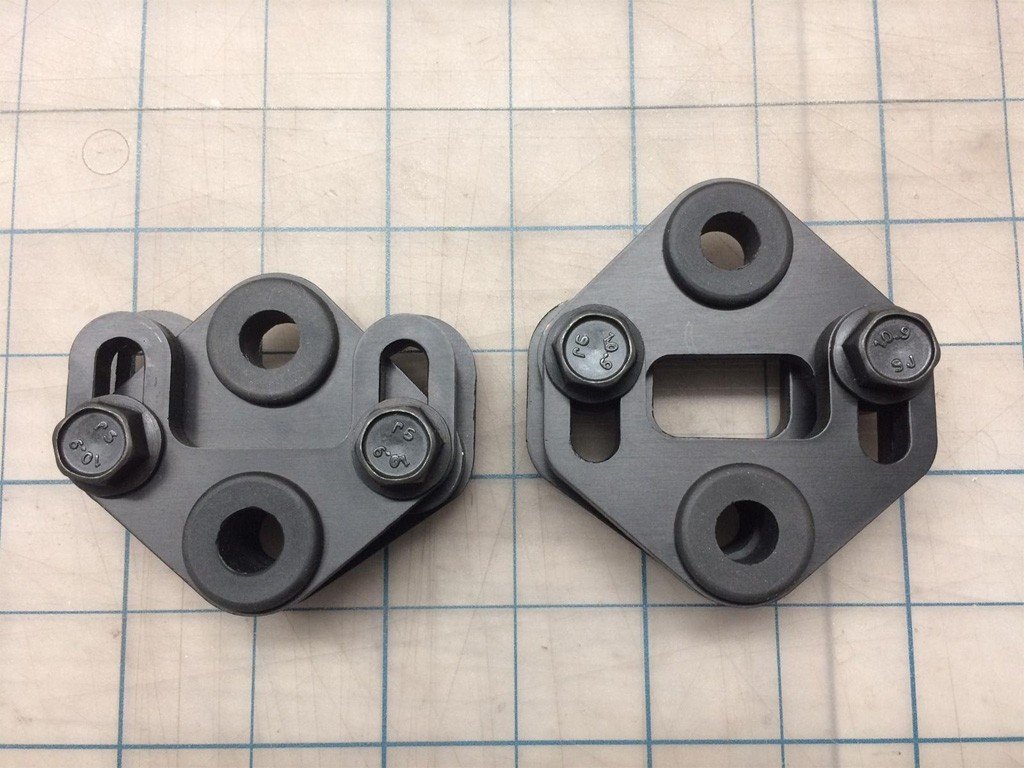
To adjust exhaust hangers, first, locate the hangers on the exhaust system. Then, use a wrench to loosen the bolts holding the hangers and reposition them as needed.
Properly adjusting exhaust hangers is essential for ensuring the exhaust system is secure and properly aligned. Over time, the hangers may become loose or misaligned, leading to vibrations, rattling, and potential damage to the exhaust system. By following a few steps, you can easily adjust the hangers and restore the proper alignment of your exhaust system.
This article will guide you through the process of adjusting exhaust hangers, providing you with the necessary knowledge to carry out this task effectively.
Contents
- Importance Of Proper Adjustment
- Tools Needed For The Job
- Finding The Right Position For Exhaust Hangers
- Adjusting Rubber Hanger Position
- Adjusting Hanging Brackets
- Checking For Proper Exhaust System Alignment
- Testing And Final Adjustments
- Are the Steps for Adjusting the Electric Choke Similar to Adjusting Exhaust Hangers?
- Maintenance Tips For Long-Lasting Results
- Frequently Asked Questions On How To Adjust Exhaust Hangers
- Conclusion
Importance Of Proper Adjustment
Proper adjustment of exhaust hangers is crucial for optimal functioning and longevity of your vehicle. Incorrect adjustment can lead to a range of issues such as excessive vibrations, noise, and even damage to the exhaust system. By ensuring the exhaust hangers are correctly adjusted, you can experience several benefits.
Firstly, it helps reduce the strain on the exhaust system, preventing premature wear and tear. Secondly, it minimizes the chances of exhaust leaks, which can negatively impact engine performance. Regular inspection of exhaust hangers is essential to identify any issues early on and address them promptly.
This proactive approach can save you from expensive repairs and ensure the smooth operation of your vehicle. So, don’t overlook the importance of properly adjusting your exhaust hangers for a hassle-free driving experience.
Tools Needed For The Job
Adjusting exhaust hangers is a task that requires specific tools and equipment. To get the job done properly, you will need a few key items. First and foremost, you will need a reliable jack and jack stands to safely elevate your vehicle.
Additionally, a socket set with various sizes, wrenches, and pliers will be necessary for removing and adjusting the exhaust hangers. You may also need a rubber mallet or a pry bar to help with any stubborn hangers. When it comes to specific product recommendations, it’s best to consult with your vehicle’s manual or seek expert advice.
By having the right tools and equipment on hand, you can ensure a successful adjustment of your exhaust hangers, improving the performance and sound of your vehicle.
Finding The Right Position For Exhaust Hangers
Examining the current position of your exhaust hangers is the first step in adjusting them properly. Look for signs of misalignment or damage, as this could affect their performance. Make sure to measure the correct distance between hangers, as it plays a crucial role in maintaining the exhaust system’s stability.
Pay attention to each hanger’s position, ensuring they are evenly spaced and aligned. This will help prevent unnecessary stress on the exhaust components and reduce the risk of damage. By taking the time to adjust your exhaust hangers correctly, you can ensure optimal performance and longevity of your exhaust system.
Adjusting Rubber Hanger Position
Adjusting exhaust hangers is crucial for maintaining the optimal performance and longevity of your vehicle’s exhaust system. To begin, carefully lift the car using a jack to support the weight of the system. Next, loosen the hanger bracket bolts and reposition the rubber hangers as needed.
It is important to evaluate the alignment of the exhaust system to ensure it is properly aligned with the vehicle’s body. If necessary, make further adjustments to ensure a secure fit. By following these step-by-step instructions, you can effectively adjust the position of the rubber hangers, promoting better exhaust system function and preventing potential damage.
Adjusting Hanging Brackets
Adjusting hanging brackets can be done easily by using a wrench or socket set. First, loosen the bolts to give you enough room to work with. Then, realign the bracket to the desired position, making sure it is properly aligned with the exhaust system.
Finally, tighten the bolts securely to ensure the bracket stays in place. By following these step-by-step instructions, you can easily adjust exhaust hangers to improve the overall performance and stability of your vehicle’s exhaust system. Don’t neglect this important maintenance task, as loose or misaligned hanging brackets can lead to rattling, vibration, and even damage to the exhaust system.
Keep your exhaust system in top condition by regularly checking and adjusting the hanging brackets as needed.

Credit: m.youtube.com
Checking For Proper Exhaust System Alignment
Proper alignment of the exhaust system is crucial for optimal performance. Ensuring that the exhaust system runs parallel to the vehicle’s frame is the first step in checking for proper alignment. It is important to verify that the hangers maintain the correct distance and alignment to prevent any issues.
If there are any signs of misalignment, such as rattling or dragging noises, it is necessary to diagnose the problem and make the necessary corrections. This may involve adjusting the exhaust hangers or replacing damaged components. By addressing any alignment issues promptly, you can avoid potential damage to the exhaust system and ensure its smooth operation.
Regular maintenance and inspection can help maintain proper exhaust system alignment and prolong its lifespan.
Testing And Final Adjustments
Adjusting exhaust hangers requires some final adjustments and thorough testing to ensure optimal performance. Lower the vehicle carefully from the jack and inspect the adjusted hangers for any signs of misalignment. Once the engine is started, listen attentively for any unusual noises or vibrations that may indicate further adjustments are needed.
If necessary, make additional tweaks to the hangers to achieve the desired positioning and secure fit. Thorough testing and inspection are key to guaranteeing a properly adjusted exhaust system that functions efficiently without any issues. Remember to prioritize safety throughout the process and follow the manufacturer’s guidelines for adjusting exhaust hangers.
Expertly adjusting these components will contribute to a smoother and more enjoyable driving experience.
Are the Steps for Adjusting the Electric Choke Similar to Adjusting Exhaust Hangers?
When it comes to “adjusting electric choke Weber 32 36“, the steps are not similar to adjusting exhaust hangers. Adjusting the electric choke involves setting the tension on the choke spring, while adjusting exhaust hangers focuses on positioning and securing the exhaust system. Both are important for optimal performance.
Maintenance Tips For Long-Lasting Results
Regular inspections and adjustments are crucial for maintaining long-lasting results when it comes to exhaust hangers. One important recommendation is to regularly lubricate rubber hangers to minimize friction and ensure smooth operation. This can be done using silicone-based lubricants that are specifically designed for rubber components.
Additionally, it is essential to clean the hangers regularly to prevent the build-up of dirt and debris, which can cause premature wear and tear. Rust prevention is another key aspect of maintenance, as rust can weaken the hangers over time.
Applying a rust-inhibiting spray or coating can help protect the hangers and extend their lifespan. By following these maintenance tips, you can prevent future issues and keep your exhaust hangers in optimal condition for a longer period.
Frequently Asked Questions On How To Adjust Exhaust Hangers
How Do You Bend An Exhaust Hanger?
To bend an exhaust hanger, carefully use heat and pliers or a pipe bender, following the hanger’s shape.
How Do You Adjust The Height Of An Exhaust?
To adjust the height of an exhaust, follow these steps: 1. Locate the clamp or bracket securing the exhaust to the vehicle. 2. Loosen the clamp or remove the bracket. 3. Slide the exhaust up or down until desired height is achieved.
4. Tighten the clamp or reattach the bracket to secure the exhaust in place.
How Do You Lower An Exhaust Hanger?
To lower an exhaust hanger, follow these steps: 1. Identify the desired height adjustment for the exhaust hanger. 2. Safely lift the vehicle using a jack or hoist. 3. Loosen the bolts or clamps securing the exhaust hanger. 4. Gently lower the hanger to the desired position.
5. Tighten the bolts or clamps to secure the new height setting. 6. Lower the vehicle and ensure the exhaust hanger is properly aligned. 7. Test the exhaust system for any abnormalities or noises.
How Do You Know If Your Exhaust Hanger Is Bad?
If your exhaust hanger is bad, you may notice a loose or rattling sound coming from your exhaust system.
Conclusion
In closing, mastering the skill of adjusting exhaust hangers is crucial for optimal performance and longevity of your vehicle. By following the steps outlined in this blog post, you can ensure that your exhaust system remains secure and properly aligned.
Moreover, with the right tools and a little patience, you can save money by avoiding costly trips to the mechanic. Remember to regularly inspect your exhaust hangers for any signs of damage or wear, as prevention is always better than cure.
By taking the time to properly adjust your exhaust hangers, you can enjoy a smoother and quieter ride, as well as extend the lifespan of your exhaust system. So, don’t hesitate to put these tips into practice and take control of your vehicle’s performance today.
Affiliate Disclosure: As an Amazon Associate, I earn from qualifying purchases made through links on this site.


